To set up your dip station for shoulder-friendly dips, make certain it’s stable and adjustable to suit your height. Keep your elbows close to your sides and lower yourself until your upper arms are parallel or slightly below the ground—avoid going too deep. Focus on gentle shoulder retraction, control, and engaging your chest and triceps. Proper setup and technique protect your shoulders, and if you keep these tips in mind, you’ll learn more about safe and effective dips.
Key Takeaways
- Adjust the dip station height so your arms are slightly bent at the bottom for shoulder-friendly range.
- Ensure the station is stable, secure, and well-maintained to prevent wobbling during dips.
- Keep shoulders retracted and down, avoiding shrugging or overextending at the bottom.
- Limit depth so upper arms stay parallel or slightly below the ground, reducing shoulder strain.
- Use supportive tools like padding or resistance bands to enhance comfort and proper setup.
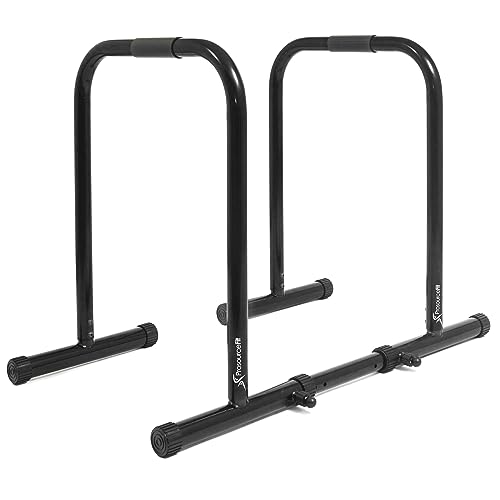
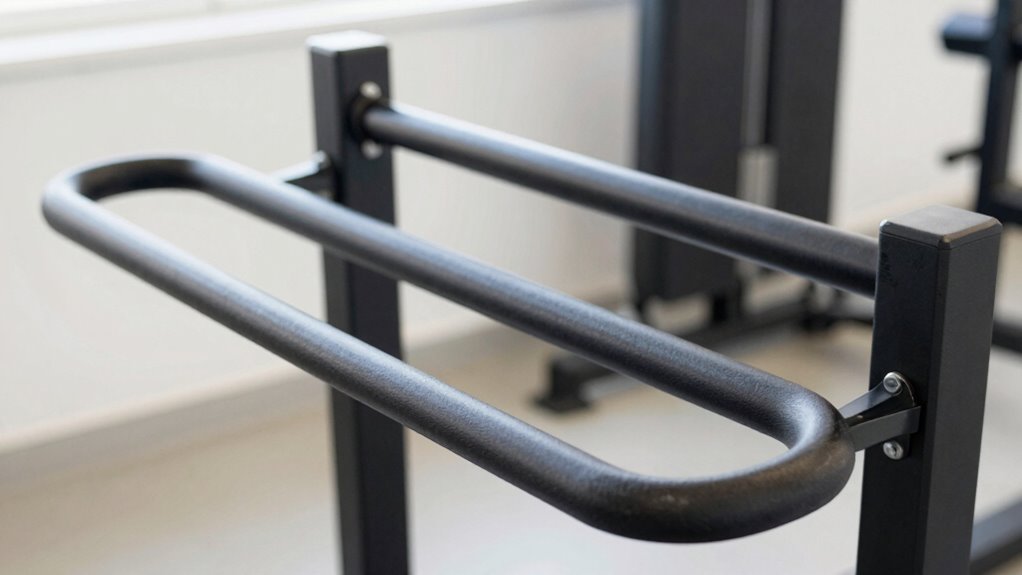
ProsourceFit Heavy Duty Dip Station, Parallel Bars with Safety Connector for Home Exercise, Strength Training, Tricep Dips, Calisthenics, and Workouts, Supports up to 400 LB, Black
SECURE STABILITY: Features non-slip rubber feet and a safety connector for a sturdy platform. Connector locks U-shaped bars…
As an affiliate, we earn on qualifying purchases.
As an affiliate, we earn on qualifying purchases.
Why Proper Dip Station Setup Is Key to Shoulder Safety
Ensuring your dip station is set up correctly is essential for protecting your shoulders during workouts. Proper setup promotes optimal muscle engagement, guaranteeing you target the right muscles without overstraining. When your equipment is stable and well-maintained, you reduce the risk of sudden shifts that could cause injury. Regular equipment maintenance, like tightening bolts and inspecting for wear, keeps your dip station secure and safe to use. An unstable or misaligned station can lead to improper form, increasing shoulder strain and risking injury. By checking your equipment before each workout and adjusting for stability, you guarantee your focus remains on effective muscle engagement. Additionally, understanding the importance of equipment stability can help you prevent accidents and improve workout safety. Ensuring your station is properly assembled and aligned is crucial for consistent safety and performance. This careful setup not only enhances safety but also helps you get the most out of your dips. Moreover, incorporating proper technique can further reduce shoulder stress and promote long-term joint health. Paying attention to equipment maintenance can also prolong the lifespan of your station and maintain its safety standards. Regularly inspecting your equipment for wear and tear ensures that minor issues are addressed before they become safety concerns.

Goimu SD01 Seated Dip Machine, 400LBS Strength Training Upper Body Machine with Tricep Dip Press & Cable Bar for Home Gym, Compact Design for Chest, Biceps, and Triceps Workout (Black)
【Ultimate Upper Body Builder】Maximize your upper body gains with the Goimu SD01 Seated Dip Machine. This all-in-one trainer…
As an affiliate, we earn on qualifying purchases.
As an affiliate, we earn on qualifying purchases.
How to Adjust Your Dip Station for Comfortable, Safe Dips
To guarantee your dips are comfortable and safe, start by adjusting the station height so your arms are slightly bent at the bottom. Keep your elbows and shoulders aligned to prevent strain and maintain proper form. If needed, use support, like a bench or cushions, to ease into the movement and build confidence. Additionally, paying attention to proper technique can significantly enhance safety and effectiveness during your dips. Ensuring correct body positioning helps reduce the risk of injury and maximizes the benefits of the exercise. Being mindful of muscle engagement also contributes to safer and more effective dips. Incorporating adjustable equipment can help tailor the setup to your individual needs for optimal comfort. Engaging in correct form reduces the likelihood of strain and promotes muscle development.
Proper Station Height Setup
Adjusting the height of your dip station is essential for performing dips safely and comfortably. Proper station height enhances station ergonomics and guarantees equipment safety. To get it right:
- Set the bars at a height that allows your arms to be slightly bent at the bottom of the dip.
- Ensure your feet can touch the ground comfortably when standing underneath.
- Confirm there’s enough clearance for full movement without hitting surrounding objects.
- Check that the station remains stable and doesn’t wobble during use.
Elbow and Shoulder Alignment
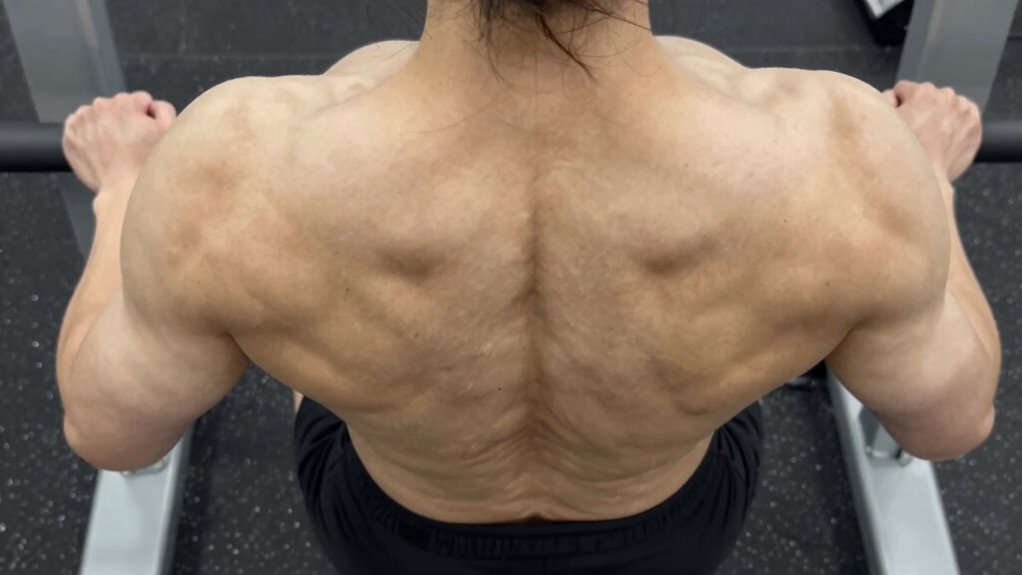
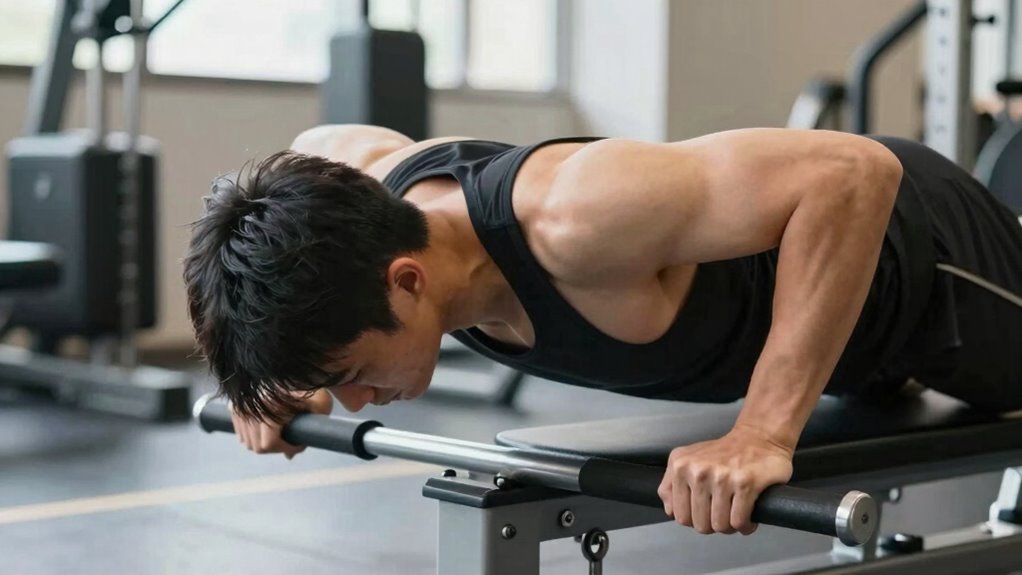
Proper elbow and shoulder alignment during dips helps prevent strain and injury while maximizing effectiveness. Start by keeping your elbows close to your sides, avoiding flaring them outward, which stresses your shoulder joints. Focus on maintaining a slight bend in your elbows as you lower yourself; this keeps your elbow position ideal and reduces unnecessary strain. Pay attention to shoulder rotation—your shoulders should stay stable and not shrug or roll forward. Rotating your shoulders back slightly can help open up the chest and keep the shoulder joints in a safe, neutral position. Adjust your station height if needed so that your shoulders are slightly below your elbows at the bottom of the movement. Proper alignment ensures a safer, more comfortable dip while engaging the right muscles.
Using Support for Comfort
Setting up your dip station correctly can make a big difference in comfort and safety. Using support gear can help reduce strain and prevent injuries during dips. Here are some comfort tips to optimize your setup:
- Add padding or foam grips to the bars for extra support and reduced pressure on your hands.
- Use resistance bands or dip assist straps to lessen the load on your shoulders and elbows.
- Adjust the height of your dip station to ensure a comfortable range of motion without overextending.
- Wear supportive wrist wraps or gloves if you need additional support for your grip or joints.
These modifications help you maintain proper form, making dips safer and more comfortable. Incorporate these support tools to enhance your workout and protect your joints.

HAPBEAR Pull Up Assistance Bands – Pull Up Bands – Resistance Bands – Exercise Bands Resistance Bands Set – Workout Bands for Working Out, Stretching, Muscle Training – Colorful (5-125LBS)
[Versatile Resistance Bands for Varied Workouts]: Elevate your exercise routine with HAPBEAR's multifunctional pull up assistance bands. Ideal…
As an affiliate, we earn on qualifying purchases.
As an affiliate, we earn on qualifying purchases.
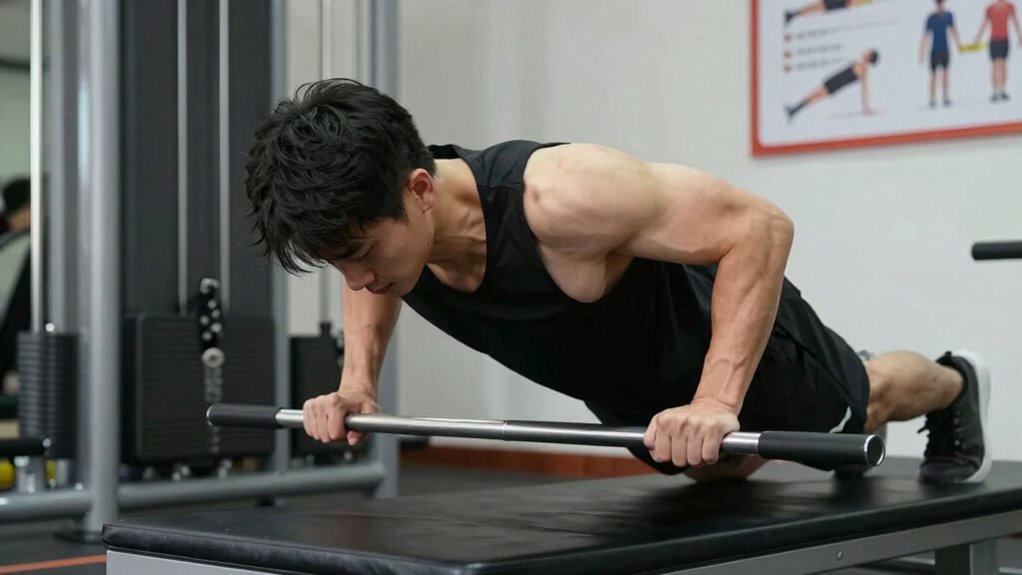
How to Find the Best Dip Depth to Protect Your Shoulders
Finding the right dip depth is essential for protecting your shoulders and maximizing the exercise’s benefits. To do this, focus on maintaining proper control throughout the movement. Start with a slightly shallow dip, similar to the push-up angles you’re comfortable with, and gradually deepen as you build strength. When gripping the dip station, keep a neutral dumbbell grip if you’re using dumbbells, which helps reduce shoulder strain. Avoid going too low, as excessive depth can overstress your shoulder joints and lead to injury. Instead, aim for a depth where your upper arms are parallel to the floor or slightly below, ensuring your shoulder blades stay retracted. Listening to your body and adjusting accordingly will keep your shoulders safe while optimizing your dip performance. Additionally, understanding joint safety principles can help guide your exercise depth and prevent injury. Being mindful of exercise biomechanics can further help you find a safe and effective range of motion to protect your shoulders. Incorporating proper exercise form techniques can also enhance safety and effectiveness during dips. Paying attention to muscle engagement during the movement can ensure you’re targeting the right muscles without compromising shoulder health. Monitoring your range of motion can help prevent overstretching and potential strain.

RELIFE REBUILD YOUR LIFE Dip bars &Dip Station Functional Heavy Duty Dip Stands Fitness Workout Dip bar Station Stabilizer Parallette Push Up Stand (Black)
【Powerful & Solid】Dip stands made of heavy duty steel and supports to 400LBS, durable steel construction provides safety…
As an affiliate, we earn on qualifying purchases.
As an affiliate, we earn on qualifying purchases.
How Do You Know If Your Dip Technique Is Hurting Your Shoulders?

If you start to feel sharp pain, persistent discomfort, or a grinding sensation in your shoulders during or after dips, it’s a clear sign your technique may be hurting your joints. To identify if your shoulder health is at risk, watch for these signs:
- Feeling pain when lowering or pushing up, especially around the shoulder joint.
- Experiencing instability or a sense of looseness, which could indicate poor stability.
- Noticing excessive strain on your dumbbell shoulder or discomfort when using resistance bands for assistance.
- Developing soreness that lingers beyond typical muscle fatigue, signaling possible joint irritation.
Pay attention to these cues; if they occur, consider adjusting your form or consulting a professional to protect your shoulders from injury.
Step-by-Step: Achieving Shoulder-Friendly Dip Form
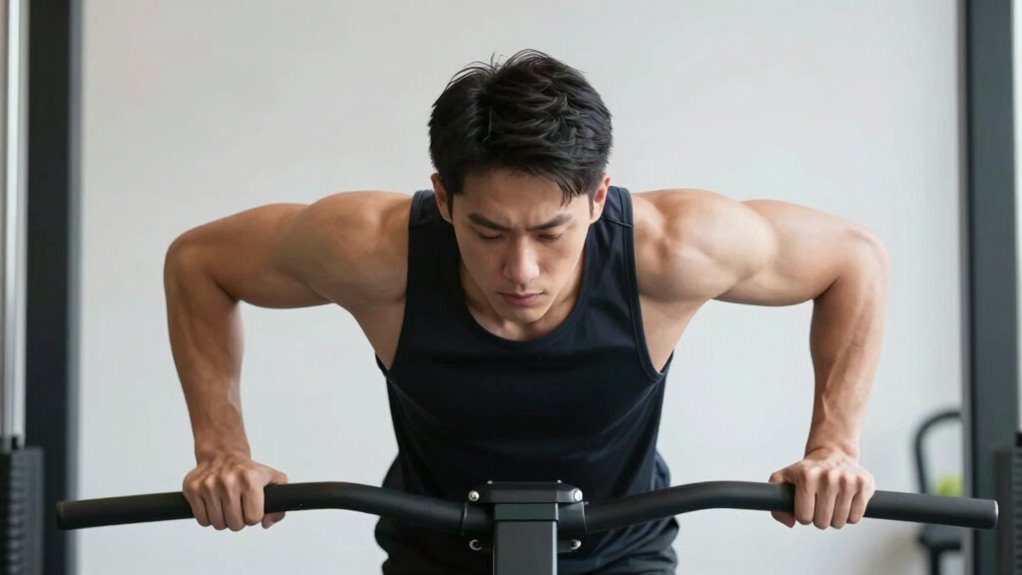
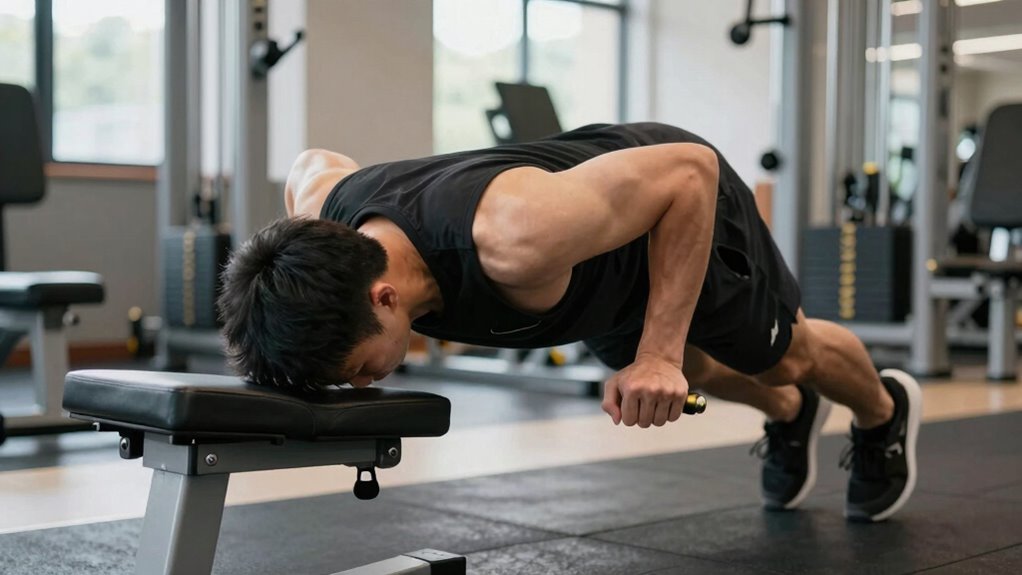
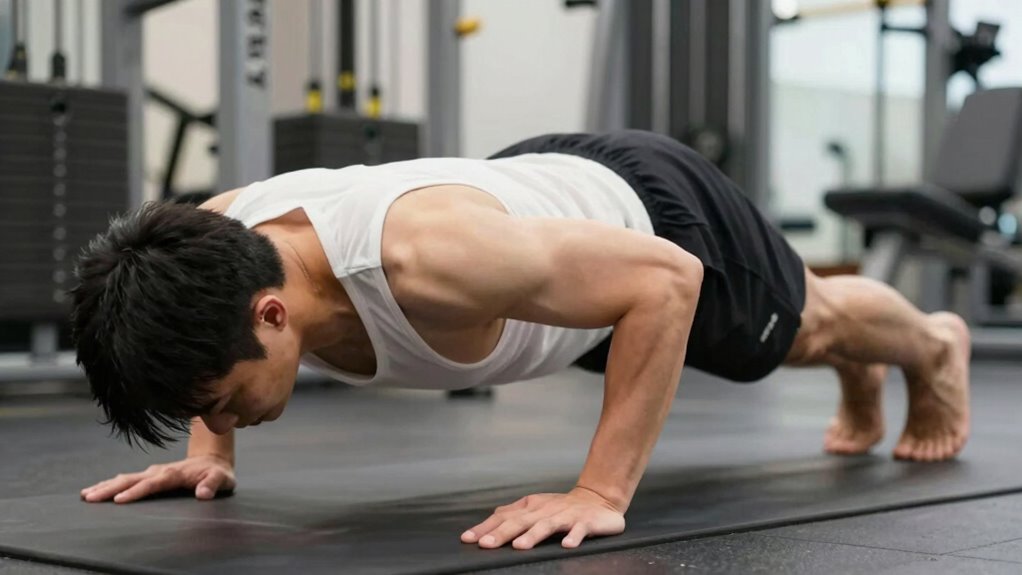
To perform dips safely and protect your shoulders, focus on mastering proper form from the start. Begin with a comfortable dipping grip, keeping your hands shoulder-width apart and your wrists straight. Engage your shoulder mobility by gently retracting your shoulder blades before lowering your body. As you descend, keep your elbows close to your sides, avoiding flaring them out, which can strain your shoulders. Lower yourself until your upper arms are parallel to the ground or slightly below, but don’t go too deep. Maintain a slight forward lean and keep your core tight. This controlled movement ensures your shoulders stay in a safe, stable position. Incorporating proper setup techniques can further enhance shoulder safety during dips. Paying attention to exercise biomechanics can also help prevent unnecessary strain and injury. Understanding the importance of contrast ratio and other visual factors highlights how precise adjustments can improve overall safety and effectiveness. Additionally, focusing on muscle activation patterns can optimize your movement efficiency and reduce risk. Being mindful of body alignment during the exercise is crucial for maintaining shoulder health. Consistently practicing this step-by-step approach helps you achieve shoulder-friendly dips with proper depth and setup.
Common Dip Mistakes That Can Hurt Your Shoulders: And How to Fix Them
Many common dip mistakes can put your shoulders at risk of injury, especially when proper form is overlooked. Mistakes like improper muscle activation and ignoring equipment durability can lead to strain or damage. Using quality office gear can also help ensure stability and safety during your workout. To avoid these issues, watch out for: 1. Overextending your shoulders at the bottom, risking joint strain. 2. Not engaging your chest and triceps properly, reducing effective muscle activation. 3. Using unstable or worn equipment that compromises your stability and form. 4. Dropping too low, which increases shoulder stress and decreases control. Fixing these mistakes involves maintaining a controlled range of motion, focusing on activating the right muscles, and ensuring your equipment is sturdy and well-maintained. Incorporating proper setup techniques can further help prevent injury and optimize your dip performance. Proper form and mindful setup protect your shoulders and maximize workout benefits. Additionally, paying attention to shoulder-friendly depth can help you maintain safety while performing dips. Moreover, understanding the dynamics of shoulder movement can enhance your ability to perform dips safely and effectively. Being aware of body position during dips can also improve control and reduce unnecessary strain on your shoulders.
Safe Variations and Modifications for All Fitness Levels
To stay safe during dips, focus on maintaining proper shoulder alignment, no matter your fitness level. You can also adjust your dip station to better suit your strength and comfort. These modifications help prevent injury and make sure you get the most out of your workout.
Proper Shoulder Alignment
Have you ever wondered how proper shoulder alignment can make or break your dip station workout? Maintaining correct alignment guarantees safe and effective training. Focus on these key points:
- Keep your shoulders down and back to promote shoulder mobility and prevent shrugging.
- Avoid letting your shoulders rise toward your ears, which can strain your joint stability.
- Engage your core to support proper posture and keep shoulders aligned with your hips.
- Use a slight forward lean if needed, but don’t compromise shoulder positioning to protect your joints.
- Incorporate Free Floating techniques to reduce unnecessary shoulder strain and enhance overall movement quality.
- Being mindful of muscle engagement can help maintain optimal shoulder placement throughout the exercise.
Adjustable Dip Station Options
Adjustable dip stations offer versatile options that accommodate all fitness levels, ensuring you can perform dips safely and effectively. By customizing height and width, you can improve shoulder mobility and joint stability, reducing strain and preventing injury. For beginners, lowering the station or using added padding provides a gentle introduction while maintaining proper form. More advanced users can increase the depth or adjust the width for added challenge, supporting continued strength gains. These modifications help you focus on shoulder-friendly depth and setup, minimizing discomfort. Always prioritize stability and control, especially if you’re working on shoulder mobility or joint stability. Adjustable stations empower you to tailor your workout, making dips safer and more effective regardless of your experience level.
How to Progress Your Dip Strength Safely Without Shoulder Pain
Progressing your dip strength safely involves more than just adding repetitions; it requires mindful techniques that protect your shoulders. To avoid pain and injury, focus on proper form and gradual increases. Here are four key tips:
- Warm up thoroughly with dynamic stretches and light dumbbell exercises to prepare your shoulders.
- Incorporate cardio routines that improve overall shoulder stability and endurance.
- Increase difficulty gradually by adding resistance bands or reducing rest time between sets.
- Listen to your body—if you feel discomfort, pause and reassess your technique or seek professional guidance.
Frequently Asked Questions
Can Dips Improve Shoulder Mobility or Cause Tightness?
Dips can improve shoulder mobility if you perform them with proper form and avoid overextending. However, if you go too deep or rush, they might cause tightness or discomfort, especially in your shoulders. To prevent tightness and promote shoulder mobility, focus on controlled movements and shoulder-friendly depth. Regularly stretching and strengthening shoulder muscles also helps maintain flexibility and prevents tightness, making dips a beneficial addition to your fitness routine.
Are There Specific Warm-Up Routines to Prevent Shoulder Injuries During Dips?
Yes, you should do shoulder stretching and warm-up exercises before dips to prevent injuries. Focus on dynamic movements like arm circles, shoulder rolls, and light resistance band stretches to increase blood flow and loosen your shoulder joints. Warming up properly prepares your muscles and tendons, reducing strain during dips. Incorporate these routines consistently to enhance shoulder stability and minimize the risk of tightness or injury.
How Does Grip Width Affect Shoulder Safety During Dips?
Think of your dips grip as the key to safe shoulders—get it right, and you’re halfway there. A narrower grip helps keep shoulder safety in check by reducing strain on the joint, while a wider grip can increase risk. Focus on maintaining a comfortable, shoulder-friendly position, and adjust your grip accordingly. Remember, a cautious approach pays off, so listen to your body and avoid pushing beyond your limits.
What Are Signs of Shoulder Impingement From Dip Exercises?
You might notice shoulder impingement signs like pain or a catching sensation during or after dips, especially around the rotator cuff area. If you experience persistent discomfort, weakness, or limited joint stability, it could indicate impingement. These symptoms often result from excessive strain on the rotator cuff tendons, compromising joint stability. Pay attention to your body’s signals, and consider adjusting your form or reducing dip depth to protect your shoulders.
Can I Incorporate Dips With Shoulder Injuries or Instability?
If you have shoulder injuries or instability, it’s best to avoid dips altogether, as studies show shoulder injuries account for over 20% of upper body workout injuries. Instead, use modification strategies like reducing depth or limiting reps, and consider alternative exercises such as push-ups or bench presses that put less strain on your shoulders. Always consult your healthcare provider before resuming dips or trying new exercises to guarantee safety.
Conclusion
Think of your shoulders as delicate wings—carefully protected by the right form and depth. When you set up your dip station properly and listen to your body, you create a safe space for strength to grow. Avoid rushing and listen to warning signs, just like tending to a fragile bird. With patience and proper technique, your shoulders can soar, turning each dip into a symbol of progress and resilience.