TL;DR
A closet booth works best when you focus on reflection control, strategic mic placement, and sealing gaps. Moving the rig out of your space is the most powerful fix, while foam and blankets are secondary. Proper ventilation is key if you put a hot rig in a closet.
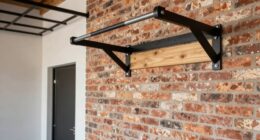
Ever noticed how your voice sounds muffled or hollow when recording in a tiny closet? That’s because small, enclosed spaces bounce sound around, creating echoes, boomy lows, and a boxy feel. The good news: you don’t need a fancy studio to fix it.
This guide walks you through simple, practical ways to tame that closet chaos—by using smart placement, basic acoustic treatment, and clever solutions like the ‘rig in the closet’ setup. Whether you’re recording vocals or just trying to keep noise from leaking, these tips will help you get cleaner, clearer sound without breaking the bank.
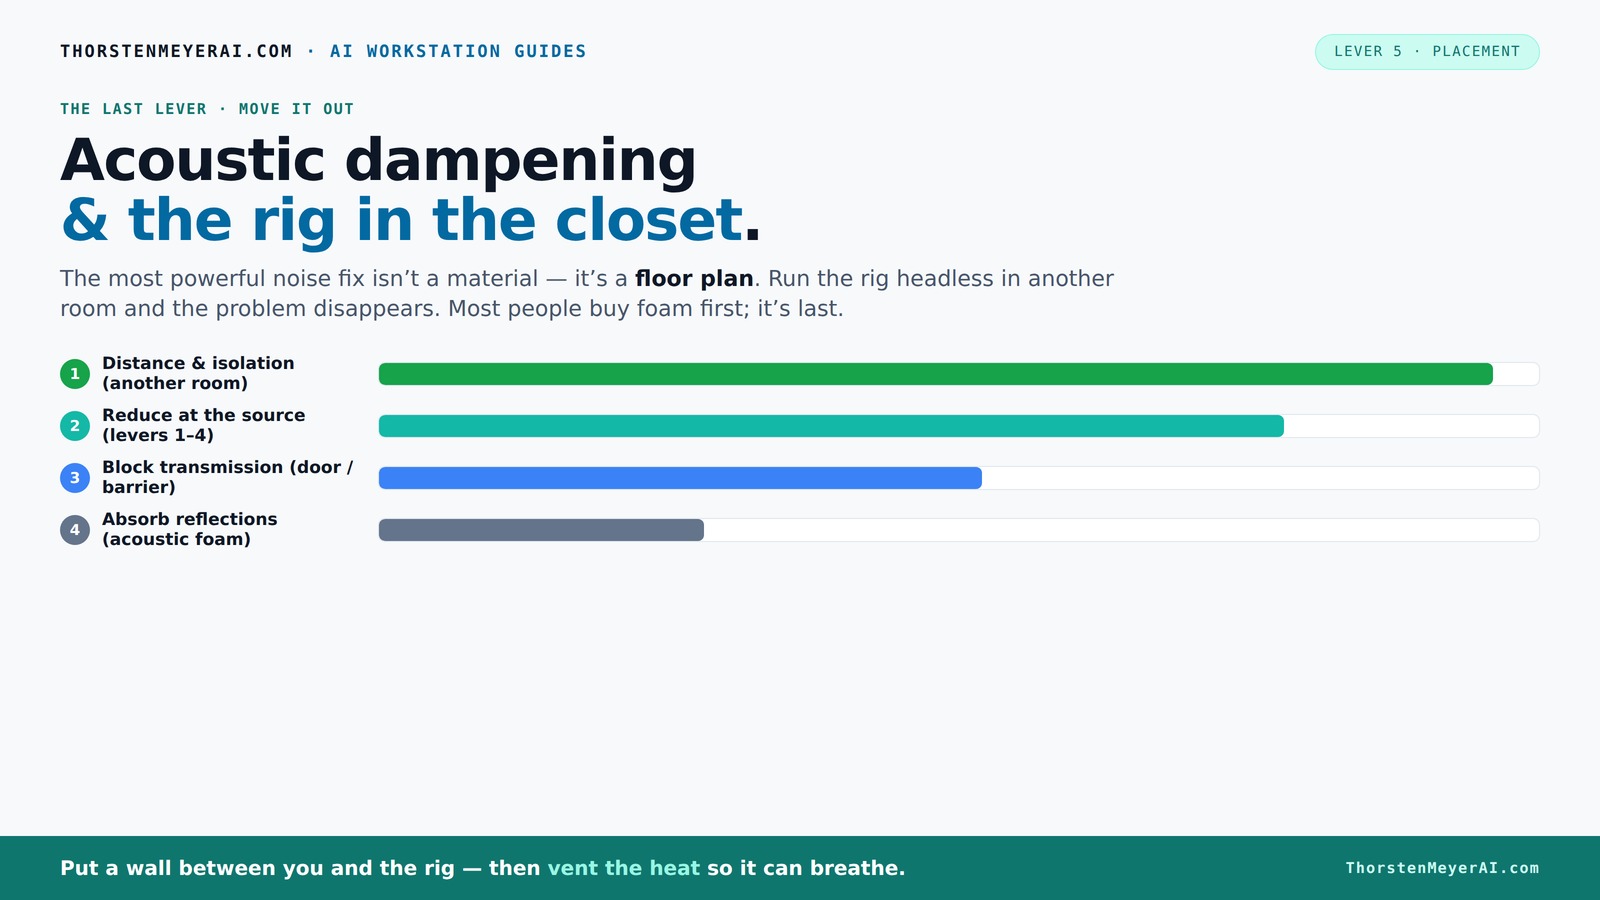
Acoustic dampening
& the rig in the closet.
The most powerful noise fix isn’t a material — it’s a floor plan. A rig you can’t hear because it’s in another room beats any amount of foam. Tap the approaches in Part 1 to see what actually works.
(another room)
(levers 1–4)
(door / barrier)
(acoustic foam)
Contain the noise, not the heat
Key Takeaways
- Moving your rig into another room or closet is the most effective way to eliminate noise at the source.
- Targeted acoustic treatment—especially at reflection points—beats just covering everything with foam.
- Mic placement and reflection control are more impactful than adding more foam or panels.
- Sealing gaps and blocking leaks around doors and vents makes a big difference in sound isolation.
- Proper ventilation is essential to prevent heat buildup and keep your rig quiet and cool.
RDCMKL XL Portable Recording Booth, Complete Home Recording Studio Soundproof Vocal Booth, Foldable with Travel Bag for Echo-Free Studio-Quality Sound, Ideal for Voiceovers, Podcasts, and Music
Transform your home studio with our complete home recording studio. This vocal booth offers clear, high-quality audio for...
As an affiliate, we earn on qualifying purchases.
As an affiliate, we earn on qualifying purchases.
Why Your Closet Is a Mini Sound Trap (And How to Fix It)
Small closets are basically echo chambers—walls close together, hard surfaces everywhere, and little room to breathe. You might also consider exploring acoustic dampening techniques for better sound control. Without intervention, you'll get a boomy, muddy sound with lots of reflections, especially from the ceiling and side walls.
Think of it like a tiny concert hall with parallel walls. You get standing waves and low-end buildup, making your recordings sound boxy and indistinct. The key is to break up those reflections and control the sound bouncing around.
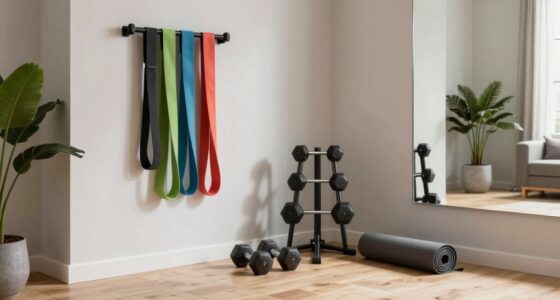
For example, hanging blankets or foam on the wall behind the mic can cut down on harsh echoes. For more detailed tips, see how to improve acoustic treatment. Placing acoustic panels on side walls at reflection points reduces echo, and putting a rug on the floor stops sound bouncing from the hard surface beneath your feet. For more insights, visit acoustic treatment strategies. These simple steps dramatically improve clarity.

Focusound 52 Pack Acoustic Foam Panels 1" x 12" x 12" Sound Proof Foam Panles Soundproofing Noise Cancelling Wedge Panels for Home Office Recoding Studio with 300PCS Double-Side Adhesive
Soundproofing - Acoustic foam panels triangular grooves structure for better noise absorption, helps to reduce and absorb unwanted...
As an affiliate, we earn on qualifying purchases.
As an affiliate, we earn on qualifying purchases.
How to Use Acoustic Treatment Effectively — It’s Not Just Foam
Acoustic dampening isn’t about covering every inch with foam. Instead, it's about targeted placement. Thick panels placed at reflection points near the microphone will cut echoes better than thin foam strips everywhere.
For example, treat the wall directly behind your mic—the biggest reflection point—by installing a broad panel or a blanket. Ceiling treatment is often overlooked but crucial because overhead reflections cause that hollow sound.
Here’s a quick list of what works best:
- Thick broadband panels at reflection points
- Blankets or foam overhead to tame ceiling bounce
- Rugs or carpets on the floor to absorb low-end reflections
- Blocking gaps around doors with weatherstripping
Remember, absorption mainly softens sound inside the space. To prevent sound from leaking out, you need barriers—like sealing gaps or adding a door blanket.

Aokeo Microphone Isolation Shield, Foldable Mic Shield with Triple Sound Insulation, Reflection Filter with 3/8" and 5/8" Mic Threaded Mount for Recording Studio, Podcasts, Singing, and Broadcasting
The Microphone Isolation Shield features a sound-proof foam front and a ventilated metal back panel to eliminate noise...
As an affiliate, we earn on qualifying purchases.
As an affiliate, we earn on qualifying purchases.
Mic Placement: The Secret to Cleaner Recordings
Where you place your microphone is more important than how many panels you hang. The goal is to avoid picking up reflections and background noise.
Start by positioning the mic at a point where it’s not directly facing a wall or reflective surface. Use a mirror or stand to identify the primary reflection points—these are spots where sound bounces directly into the mic.
For example, if your closet has a narrow shape, place the mic slightly off-center, aimed at your mouth, and away from walls. Use a reflection filter or a makeshift shield—like a folded blanket—around the mic to block unwanted sound.
In practice, a simple rule is: the closer the mic is to your mouth, the less room sound it captures. But beware of proximity effect—too close and your voice may sound exaggerated or boomy.

VEVOR Portable Vocal Booth, 6.56 ft Height, Portable Recording Studio with Travel Bag, Mobile Tablet Stand, Thickened Soundproofing, Sound Isolation Booth for Echo-Free Vocals, Podcasts, Voiceovers
Say Goodbye to Echoes: Built with durable Oxford cloth and acoustic padding, this recording booth for the home...
As an affiliate, we earn on qualifying purchases.
As an affiliate, we earn on qualifying purchases.
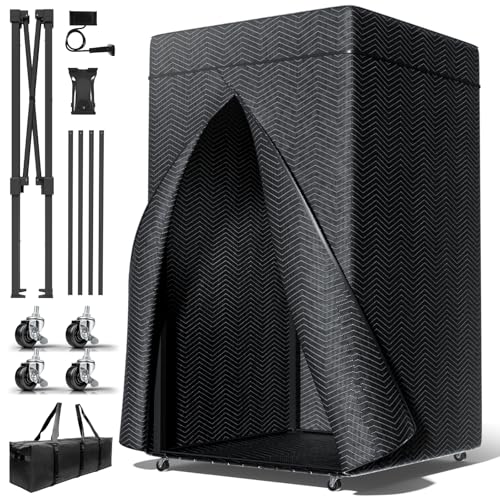
The 'Rig in the Closet' Setup — How to Keep It Cool and Quiet
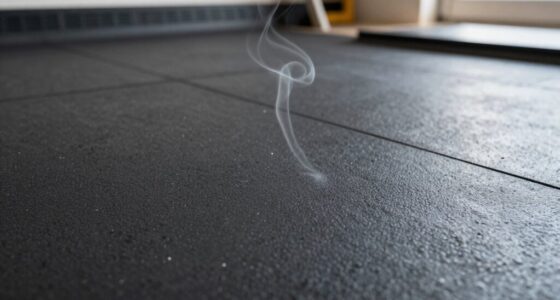
Placing a high-power rig in a closet is a genius move—noise and heat are locked away, and you get a quiet workspace. But there's a catch: heat buildup.
A sealed closet traps hot air, causing temperatures to rise quickly if the rig is under load. For example, a GPU pulling 600W can raise the ambient temperature by 10-15°F in just an hour if it’s fully sealed.
The fix? Ventilation. Use a quiet exhaust fan or install a small duct system. Passive vents help, but active cooling keeps temperatures stable and prevents throttling fans from ruining your silence.
Check out engineered soundproof cabinets that combine insulation with temperature control. You can learn more about soundproofing solutions for your rig. They keep noise down and heat out—perfect for a rig in the closet. For detailed ideas, see how to reduce heat and noise in an AI workstation.
Sealing Gaps and Blocking Sound Leaks — The Hidden Wins
Sound escapes through cracks, gaps around doors, and ventilation openings. Sealing these leaks is an easy win that makes your entire setup more effective.
For example, applying weatherstripping around closet doors or sealing cracks with acoustic sealant can reduce sound leakage by up to 60%. Even a simple door blanket or hanging quilt can cut down noise significantly.
In a real scenario, a streamer used weatherstripping and a thick curtain over the door, turning a noisy closet into a near-silent booth. It’s a low-cost fix that pays off.
Don’t forget to block gaps around cables, vents, and electrical outlets with foam or putty—these tiny leaks add up.
Ventilation and Heat Management — Keep Your Closet Rig Cool
Good airflow is non-negotiable when placing a rig in a closet. Without it, heat builds up fast, causing throttling and loud fans.
Use a quiet exhaust fan, perhaps with a thermostat, to draw hot air out and bring in cooler air. Ducting can help direct airflow efficiently. For example, a small, low-noise fan connected to a vent on the closet door can keep temperatures stable during long sessions.
Check out liquid cooling options or AIO coolers that push heat outside the closet via radiator hoses. They’re more effective than relying solely on fans and keep noise levels down.
For more on cooling strategies, see liquid vs. air cooling for inference rigs.
Frequently Asked Questions
Is acoustic foam enough to make my closet studio sound good?
Not quite. Foam absorbs echoes but doesn't block sound from leaking out or in. For best results, combine foam with sealing gaps and strategic placement of absorption panels at reflection points.Where should I place acoustic panels in a small closet?
Treat the wall behind your mic, the ceiling above your head, and side walls at reflection points. Covering these spots reduces echoes and improves clarity significantly.Do I need bass traps in a tiny closet booth?
Unless you notice booming lows or standing waves, bass traps are optional. In small spaces, low-frequency issues are less pronounced but can be added if needed—usually in upper corners.How do I stop sound from leaking through the door?
Use weatherstripping, door blankets, or acoustic sealant around gaps. Adding a heavy curtain or blanket over the door can also cut down noise leaks effectively.What’s more important: soundproofing or acoustic treatment?
Soundproofing blocks sound from entering or leaving, while acoustic treatment improves sound quality inside. Focus on blocking leaks first, then treat reflections for the best results.Conclusion
Your closet can turn into a quiet, professional-sounding booth—if you focus on the right tricks. Prioritize moving the rig away, then treat reflection points and seal leaks. Remember: heat and sound leak are the main enemies, and fixing them makes your setup truly effective.
Think of your closet as a tiny studio—smart placement, strategic treatment, and ventilation turn chaos into clarity. Now, go set up your perfect little sound fortress. Your recordings—and your ears—will thank you.