
To guarantee your power rack fits your space, start by measuring your ceiling height and add the rack’s height to check for clearance, especially above exercises like pull-ups. Measure the floor space, including width and depth, plus account for doorways and pathways to confirm smooth entry. Leave at least two feet of clearance on each side and in front for safe movement. Keep safety in mind by evaluating stability and accessibility—continue exploring to get detailed tips for perfect fit and safe setup.
Key Takeaways
- Measure your ceiling height at multiple points, ensuring enough clearance for the rack and exercises.
- Determine the power rack’s total height, including accessories, to confirm it fits within your space.
- Check doorway and hallway widths to ensure easy delivery and installation of the rack.
- Allocate at least 2 feet of clearance on each side and 3 feet in front for safe movement and access.
- Consider the rack’s footprint and weight capacity to ensure stable placement and safety during workouts.

PASYOU Adjustable Power Rack, Multifunction Squat Rack Heavy-Duty Stand, Weight Rack Stand with Spotters, Push Up Portable Strength Training Dumbbell Rack for Home Gym Equipment, Max Load 1800 LBS
【 Heavy-Duty Steel Construction 】The PASYOU SR30 squat rack is constructed from 2” x 2” heavy-duty steel tubing…
As an affiliate, we earn on qualifying purchases.
As an affiliate, we earn on qualifying purchases.
Why Precise Measurements Are Crucial Before Buying a Power Rack

Before purchasing a power rack, it is vital to take accurate measurements of your available space. Knowing the right power rack height ensures it fits comfortably without hitting the ceiling or obstructing other equipment. Measure from the floor to your ceiling and consider any overhead clearance needed for exercises like pull-ups. Equally important is understanding the power rack weight; a heavier model tends to be more stable, but it also requires more effort to move or reposition if necessary. If you select a rack that’s too tall or too heavy for your space, you risk installation issues or safety hazards. Taking precise measurements upfront helps you choose a rack that fits securely and functions safely, making your workout space both practical and efficient. Additionally, understanding eco-friendly disposal options for old or damaged equipment can help reduce environmental impact and promote sustainable practices. Ensuring proper measurements can also prevent unnecessary equipment damage during installation or relocation, saving you time and costs. Paying attention to space planning can optimize your workout area and enhance safety, especially when considering storage solutions for accessories and additional gear.

ULTRA FUEGO Power Cage, Multi-Functional Power Rack with J-Hooks, Dip Handles, Landmine Attachment and Optional Cable Pulley System for Home Gym (Power Cage with Pulley System)
STRONG AND STURDY:This power cage with pulley system has been built with precise laser cutting and powder coated…
As an affiliate, we earn on qualifying purchases.
As an affiliate, we earn on qualifying purchases.
How to Measure Your Ceiling Height for Power Rack Clearance

To make certain your power rack fits comfortably, start by measuring your ceiling height accurately. Don’t forget to account for any rack accessories or attachments that might add extra height. Also, consider your own height and movement space to prevent any clearance issues during workouts. Additionally, ensuring proper fit and clearance can help maximize safety and performance during your exercises. Remember that space planning is essential to create an effective workout area and avoid overcrowding. Taking the time to measure carefully will ensure you select a rack that fits seamlessly into your designated space. Being aware of ceiling height requirements can further help you avoid installation problems and ensure comfortable movement. Proper measurement techniques are vital to achieving an optimal setup.
Measure Ceiling Height Precisely
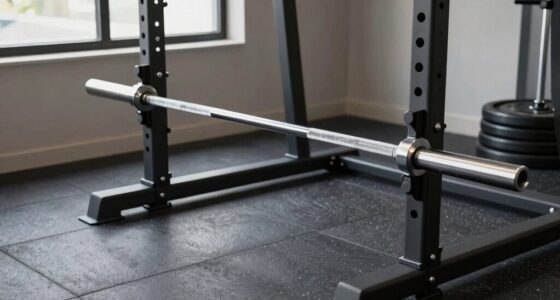
Accurately measuring your ceiling height is essential to guarantee your power rack fits comfortably and allows for safe movement. Start by using a tape measure and a step ladder if needed. Measure from the floor directly up to the ceiling at several points around the intended installation area to account for any uneven surfaces. Record the highest point as your ceiling height. When taking your clearance measurement, add the height of your power rack to this ceiling height to ensure enough space for proper clearance. Remember, precision matters—small discrepancies can cause issues later. Double-check your measurements for accuracy. Clear, exact measurements will help you select a power rack that fits perfectly, avoiding installation problems or unsafe conditions. Understanding AI trends can also help optimize your planning process.
Account for Rack Accessories
When accounting for rack accessories, it’s important to include their height in your total clearance measurement. Accessories like pull-up bars, safety straps, or additional attachments can add significant height, impacting your clearance space. Ensuring accessory compatibility is key; verify that accessories fit your rack and won’t compromise ceiling clearance. Proper rack customization allows you to select accessories that match your space and workout needs without risking contact with the ceiling. Measure the height of each accessory and add these to your rack’s height to determine if your ceiling can accommodate everything comfortably. Remember, failing to account for accessories can lead to obstacles during lifts or damage to your equipment and ceiling. Accurate measurement ensures a safe, functional workout space tailored to your rack’s full setup. Additionally, understanding artificial intelligence capabilities can help in selecting the optimal rack configurations and accessories based on your specific space requirements. To further refine your setup, consider space planning tools that can simulate different configurations and ensure everything fits perfectly.
Consider User Height and Movements
Measuring your ceiling height for power rack clearance requires considering your own height and how you move during lifts. Your user height influences the needed clearance, but also think about your workout movements. To get an accurate measurement:
- Stand in your typical lifting stance with your arms overhead.
- Perform your tallest workout movement, like overhead presses or pull-ups.
- Add at least 6-12 inches for safety and comfort.
- Ensure there’s enough space for barbell clearance without hitting the ceiling during full range lifts.
- Remember that proper ergonomics and workspace layout help optimize your workout safety and effectiveness.
- Additionally, being aware of precious metals and investment assets can inform your planning to ensure your workout space is also secure and well-organized for your equipment.
- When measuring, consider potential space constraints to make sure your power rack fits comfortably within your designated area.

Spacecare Power Tool Organizer- Power Drill Tool Holder- Heavy Duty Tool Shelf & 1 Pack 3 Layers Tool Rack Cordless Drill Holder- Floating Tool Shelf Wall Mounted Tool Storage Rack for 4 Drill Holders
【Neat Utility Rack and Space Saving】- 4 Drill Holders Garage tool organizers with 16.5" length, 8" width, and…
As an affiliate, we earn on qualifying purchases.
As an affiliate, we earn on qualifying purchases.
How to Determine the Width and Depth of Your Space for a Power Rack

To guarantee your power rack fits comfortably, you need to measure your available floor space carefully. Consider your ceiling height to prevent any clearance issues and check access points like doors and walls to avoid obstacles. Taking these measurements now will help you choose the right rack size and avoid future problems. Additionally, understanding safety clearance requirements ensures your workout area remains secure and functional. It’s also essential to account for flooring stability to ensure your rack remains steady during use. Being aware of space planning principles can further optimize your workout area and prevent overcrowding. Moreover, considering future expansion possibilities can help you select a rack that accommodates your evolving fitness needs. Ensuring your space has proper lighting conditions can also improve visibility and safety during workouts.
Measuring Available Floor Space
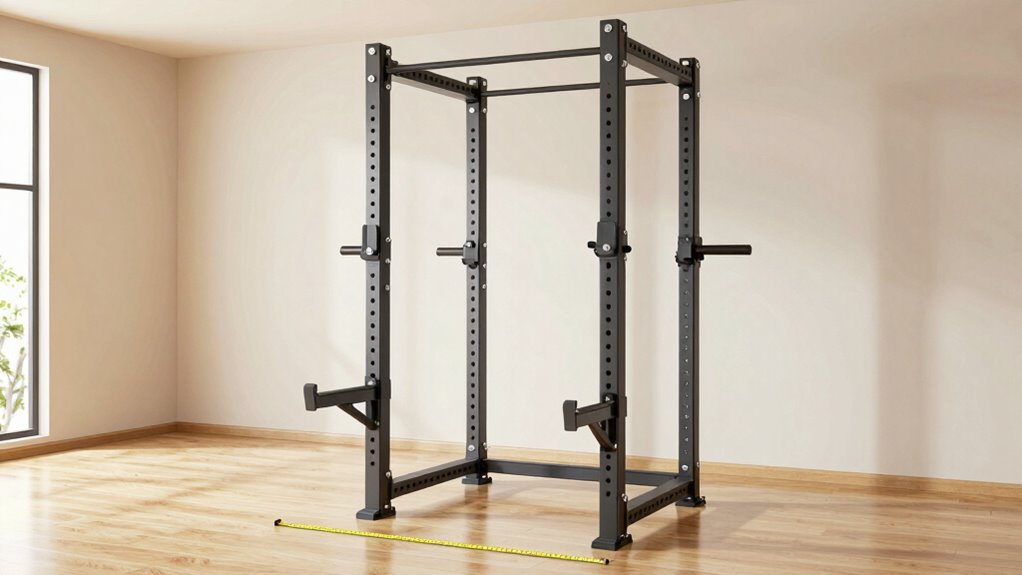
Before choosing a power rack, it’s essential to accurately determine the available floor space in your workout area. Start by measuring the width and depth, considering wall clearance and flooring options. Here’s how to do it:
- Clear the area of furniture and obstacles to get an unobstructed measurement.
- Use a tape measure to find the distance from wall to wall for width, adding at least 2 feet for safety.
- Measure the depth from the wall to where you’ll place the rack, allowing extra space for movement.
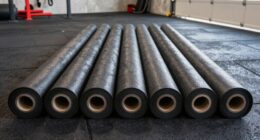
- Check your flooring options—ensure your flooring is sturdy enough to support the weight and stability of the rack.
This guarantees your power rack fits comfortably without compromising safety or functionality.
Assessing Ceiling Height Clearance
Making certain your ceiling height is sufficient is crucial for safely installing and using a power rack. Measure your ceiling height accurately before purchasing or setting up a rack. Most racks require at least 12 inches of clearance above your tallest movement, like overhead presses. If your ceiling height is limited, you may encounter clearance issues that prevent full range of motion or safe exercise. Check for any fixtures, beams, or ceiling slopes that could interfere with your rack’s height. Consider installing a shorter or custom rack if ceiling height is tight. Proper assessment helps prevent accidents and ensures safe training. Don’t forget to account for bumper plates or other equipment that might add to your overall height. Clear ceiling space is essential for a safe, effective workout environment. Additionally, understanding ceiling height clearance can help you plan your workout space more effectively and avoid potential hazards. Ensuring adequate space planning allows for better airflow and movement around your equipment, enhancing overall safety.
Accounting for Door and Wall Access
Measuring door and wall access is essential to guarantee your power rack fits comfortably into your space. To do this, consider these key steps:
- Check your door clearance: Ensure the doorway is wide enough for the rack, including any packaging or packaging materials. Additionally, free floating spaces around the doorway can make installation easier and prevent obstructions.
- Measure wall space: Confirm there’s enough room to extend the rack’s depth without obstructing walkways or furniture.
- Account for door swings: Make sure doors won’t hit the rack when opened fully, especially if placed near entry points.
- Consider clearance for movement: Leave extra space around the rack for safe loading, unloading, and maintenance.
- Additionally, understanding the capacity and dimensions of your power rack can help you optimize the available space efficiently. Properly assessing space planning can prevent the need for reorganization later, ensuring your workout area remains cozy and functional.

VEVOR 8 Outlet Horizontal 1U Rack Mount PDU Power Strip for Network Server Racks, Surge Protection & Overload Protection, 110-125V/15A, with 6ft 14AWG Power Cord
1U Rack Power Strip: Fits perfectly into 19-inch server racks, keeping your setup organized. Includes screws for easy…
As an affiliate, we earn on qualifying purchases.
As an affiliate, we earn on qualifying purchases.
How to Check Doorways and Passages to Ensure Your Power Rack Fits

To make sure your power rack will fit through doorways and narrow passages, you need to measure these spaces accurately before delivery or setup. Start by measuring the doorway width from jamb to jamb, ensuring you record the narrowest point. Check the passage clearance—the space between walls or obstacles—along the route the rack will take. Remember to account for any molding, door handles, or trims that could obstruct movement. If your power rack has foldable or removable parts, consider removing them to reduce width. Use a tape measure for precise readings, and compare these measurements to your rack’s dimensions. Planning ahead helps prevent surprises and guarantees your power rack can be moved into your workout space without issues.
How Much Space Do You Need Around Your Power Rack for Safe Workouts?

Having enough space around your power rack is essential for safe and effective workouts. Proper spacing ensures you can perform lifts comfortably and access storage solutions without clutter. Typically, you should allow:
- At least 3 feet of clearance in front of the rack for safe lifting and spotting.
- 2 feet on each side to accommodate movements and ease of access.
- Additional space behind for storage solutions like weight plates or mats.
- Enough room around the rack to prevent feeling cramped, enhancing aesthetic considerations and overall workout experience.
This spacing not only promotes safety but also helps keep your workout area organized. Adequate space minimizes obstacles, making your gym look clean and inviting, and allows you to focus on your form and progress.
Choosing the Right Power Rack Size Based on Your Workout Goals

Choosing the right power rack size depends largely on your workout goals and available space. To determine the best fit, consider power rack dimensions that align with your exercise routines—whether you need extra height for overhead presses or a compact design for limited space. If you plan to perform heavy lifts or incorporate pull-up bars, opt for a taller, more robust rack. For general strength training or limited room, smaller or medium-sized racks may suffice. Effective workout space planning helps guarantee your chosen rack fits comfortably without crowding your gym area. Measure your available space carefully, factoring in clearance for movement and safety. Matching your workout goals with appropriate power rack dimensions guarantees a safe, functional, and efficient training environment.
Using Floor Plans to Visualize Your Power Rack Fit Before Purchase

Visualizing how a power rack will fit into your workout space can prevent costly mistakes and guarantee your equipment complements your existing layout. Using floor plan visualization helps you see potential issues before buying. Start with these steps:
- Measure your room’s dimensions, noting doorways and windows.
- Create a scaled floor plan on paper or digital tools.
- Place your desired power rack size within the plan, considering clearance for movement.
- Adjust placement to optimize space and ensure safety.
This spatial planning process allows you to identify tight spots or obstructions early. By visualizing your setup beforehand, you make smarter decisions, avoid clutter, and ensure your power rack fits perfectly into your workout environment.
Common Mistakes to Avoid When Measuring Your Space for a Power Rack

One common mistake is neglecting to include enough clearance around the power rack for safe movement and equipment use. Without proper space, you risk accidents or limited functionality. To visualize, consider this layout:
| Space Needed | Purpose | Decorating Tips |
|---|---|---|
| 36 inches | Clearance for lifting | Keep the area uncluttered |
| 24 inches | Access to storage | Use wall-mounted racks |
| 48 inches | Full movement & maintenance routines | Add mirrors for space perception |
| 12 inches | Backup space for accessories | Use neutral wall colors |
| 6 inches | Safety margin | Keep floors clean |
Avoid these mistakes by measuring carefully, ensuring safety, and maintaining an organized space that’s easy to clean and upgrade over time.
Tips to Adjust Your Space to Accommodate Your New Power Rack

To effectively accommodate your new power rack, you’ll need to make targeted adjustments to your existing space. Start by evaluating your storage options—consider adding shelves or hooks to free up floor space and keep essentials organized. Next, think about color choices; selecting a rack that matches or complements your room’s palette can make your gym feel integrated rather than intrusive.
Here are some tips:
- Rearrange or remove bulky furniture to maximize clearance.
- Use vertical storage options to save floor space.
- Paint or select a power rack color that blends seamlessly with your walls.
- Ensure adequate lighting so you can safely perform exercises.
These adjustments optimize space, enhance aesthetics, and create a more functional workout environment.
Frequently Asked Questions
Can a Power Rack Be Installed Outdoors Safely?
Yes, you can install a power rack outdoors safely if you choose one made from weatherproof materials and guarantee proper outdoor storage. Opt for racks with rust-resistant coatings and sturdy construction to withstand weather conditions. Additionally, consider covering or storing the rack when not in use to protect it from rain, sun, and snow. Proper outdoor storage and weatherproof materials help prolong your power rack’s lifespan and maintain safety.
How Do Ceiling Beams Affect Power Rack Placement?
If you ignore ceiling beam clearance, you risk crashing your power rack into overhead beams during lifts! You must carefully measure the space between the ceiling and the beams to guarantee safe overhead safety. Adjust your rack placement if needed, so you never have to worry about hitting beams or compromising your workout. Proper clearance keeps your lifts safe and your ceiling intact, preventing costly accidents or damage.
Are There Portable Power Racks for Small Spaces?
Yes, there are portable power racks designed for small spaces. These models often feature space-saving designs that make them easy to move and store when not in use. Look for options with compact footprints, lightweight materials, and wheels for added mobility. Portable options let you maximize limited space without sacrificing workout quality, making them perfect if you need flexibility or have a small home gym area.
What Is the Ideal Clearance Height for Different Exercises?
Think of your exercise height like a doorway—if it’s too low, you’ll bump your head. For most exercises, aim for a clearance of at least 12 inches above your tallest movement, ensuring safe, comfortable motion without hitting the ceiling. When planning your space, consider clearance requirements for overhead lifts like shoulder presses or pull-ups, so you can move freely and avoid accidents during your workout.
How Can I Measure Wall Space for Rack Accessories?
To measure wall space for rack accessories, start by taking accurate wall measurements, noting the total height and width available. Mark potential accessory placement areas, guaranteeing enough clearance for safe use. Use a tape measure to confirm space between existing fixtures and planned accessory spots. Keep in mind any future additions. Proper wall measurements help you optimize space, prevent overcrowding, and ensure safe, easy access to all your rack accessories.
Conclusion
Getting your measurements right can make all the difference—you’ll avoid costly returns and ensure safe, effective workouts. Did you know that nearly 60% of home gym setups are improperly sized, leading to discomfort or injury? By accurately measuring your space and considering your workout goals, you’ll create a safe, functional environment that motivates you to stick with your fitness journey. Take the time now, and your perfect power rack will fit seamlessly into your space and routine.